
From many perspectives, sunflowers are pleasant. Just seeing one makes me feel warm and beautiful inside. I realize that the coldest season of the year is getting closer, but sunflowers will never be outside the base time! Today, I will guide you draw a sunflower using pencil and paper. There are many steps, so make sure to follow each step appropriately. This may be more troublesome than some of the other guided exercises I have performed, but the guidelines and model pictures should help you follow-up.
1. Painting center
Start to move forward by drawing a circular bunch of sunflower seeds to solve. This is the round caramel cloth that should sit in the middle of the petals. Start by drawing a circle.
2. Add details to the center
Give the middle a more reasonable appearance. The seeds on the sunflower look hairy. So, add a few rows to increase the surface.
3. Add depth
By attracting more obscure and thicker lines as the seed’s focus, the source has more depth. Generally, the middle area is significantly more foggy than the outer space.
4. Add petals
At the moment, this is an ideal opportunity to move forward to the most memorable aspects. All aspects are taken into consideration! This may be the most prolonged and most troublesome development. Anyway, it was for me when I first started!
5. Draw the first layer
Make sure to draw the leading layer of petals around the seed binding area in a counterclockwise direction.
6. draw a sunflower the next petal layer
After finishing drawing the original petal set, this is an ideal opportunity to move on and take a step back. Even If you sprinkle licorice on a sunflower, you will find that there are usually petals on the back. This will only make the flowers bloom bigger, more beautiful, and stand out.
7. Draw the stem
Draw the stems from the drop of the petals with the highest degree of reduction. Very simple, right?
8. Sketch on the leaves
Combine several leaves scattered in various parts of the stem. I don’t like the existence of even-numbered leaves because it is tiring and unnatural! Full of imagination! The leaves do not need to be close to or coordinate with each other.
9. Add more details
These continue in two stages, around memorizing more leaf details. I left my midrib to each leaf.
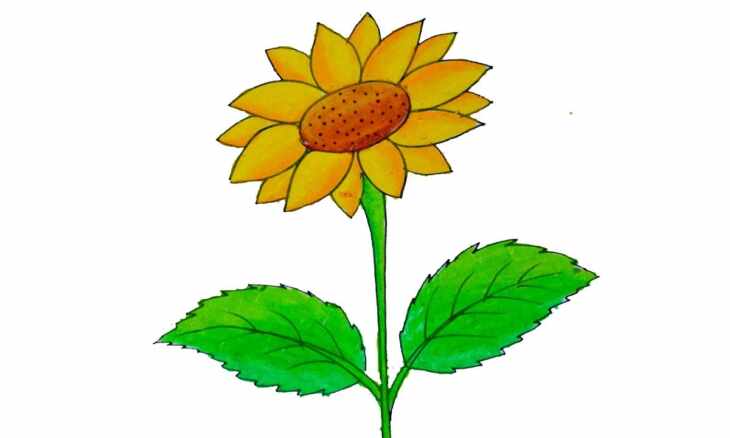
10. Add leaf veins
To wrap things up, add some veins to the leaves. This adds authenticity to your plates. From then on, you are officially done! I strongly stipulate that you should cover the sunflower to make it jump out. I believe you like this guided exercise!
Final thoughts
How can you be sure that pulling out sunflowers, again and again, maybe a little tricky, but this kind of guided practice should provide you with incredible guidance as an excellent opportunity to become an amateur? If you want, don’t hesitate to share your thoughts and results!
This particular job took me some time to complete. From the beginning, I started drawing sunflowers and filming each progress as usual, but once I finished drawing, I didn’t know how to manage it next. At that time, a crazy idea happened to me: imagine a scene in which I drew ten sketch-like variants for each sketch and used unique patterns. In this way, you can see the difference between each pencil, and you can see the expectations of using shaded pencils and colored pencils or oil pastels and acrylic paint. I spent some time because I did finish ten drawings/artwork for this business and then finished some on PC. In short, when everyone was done, I drew very similar things again and again. I was so tired, but it was nice to see everyone next to each other.
This page works this: From the beginning, I will introduce the guiding principles of the sketch step by step. After that, I will teach the guiding principles of acrylic painting one by one and explain point by point for the shaded pencil. In the end, you will see all kinds of pictures I use made with all sorts of materials.
Please remember that this sketch is my sketch. You can be yourself in your way, an extraordinary and lovely person. Just use these instructions as your own free rules, but in the end, it should become your skill.
Instructions for draw a sunflower
I start with the letter C as the focus of the central flower. The flowers will face sideways, so the middle is an oval rather than a circle.
I left the room open. This is the reason for the letter C. There will be a few petals in that space. Now I added a petal. It is a simple triangle with a little curved on each side.
I continue to add more and more petals. In most cases, they are three-sided violins.
Some are longer, some are more limited, and some cover. Continue to work in the middle.
Keep adding petals until you are satisfied with the appearance of the blossom! Draw some curves by yourself, while others can’t see their skills.
Remember, this is just a sketch, so if things don’t appear as you trust, please don’t overemphasize them.
Add green leaves to the back of the flower (I’m sure they have a name, but I don’t know what it is).
It’s time to draw the stem and start the leaves. The main blade starts from the bending line, as shown in the figure above.
Finish the leaf by placing an edge with an edge as the bottom line.
Leave a mark on the spot with spots at the focal point of the next sunflower. Try not to draw a firm line for now. This sunflower is looking forward, so there is a circle in the middle.
First, draw a few petals. They look like twisted water droplets. Keep walking around until you have walked through the entire circle. They can cover each other, or they can cover each other, or have holes in the middle.
I concluded that the sunflower would be behind the first sunflower, so the petals are behind the central sunflower’s leaves.
Finish the petals, then add some additional petals on the back. Draw the stems and leaves.
Then, draw some ellipses. This is the tip of the small flower bud. Just where the leaves pierced Smidgen.
It began to cut off the budding state. First, draw an adjusted base for it, and then start adding a few leaves and petals.
Could you give it a stem?
Mark the position of the next bud with a faint line. This time I started with leaves, so I drew a little plate on the bottom.
At that time, I painted more leaves. Some are twisted around the bud, and some fall off the bud.
Finish the bud, and afterward draw a stem for it and a few leaves.
Presently the sketch is finished!
I began by moving the sketch to the material utilizing move paper. At that point, I chose the tones: blues, greens, whites, and yellows.
I began with the foundation. Utilizing a broad level brush, I blended the paint directly on the material as I was painting.
I go all the more cautiously when I paint the foundation close to the blossoms and leaves and such. I blended in light green with blue and white.
In the photograph over, my experience is finished. This is the primary layer, because later on I chose the foundation is excessively light and added some dull greens and browns on the base. It would have been more straightforward in the event that I did it immediately.
I utilized watery yellow paint and filled in the petals with earthy colored color and focuses.
At that point, I obscured the foundation, as referenced above, and did the leaves utilizing a dull and light green.
For leaves and stems. I start by filling them with a more obscure green, as in the photograph above.
At that point, utilize lighter green/earthy colored/white to make features.
For each leaf, both the large leaves and the bud leaves, first I did each plate in dull green, and afterward added features with lighter tones.
Here are the full bud and stem, wrapped up.
For the petals, it is a similar thought concerning the leaves. First, fill in with yellow, and afterward add features with a white and shadows with a touch of rosy earthy color. You need a smidgen of the more obscure tone, as the more significant part of your petal should come through as yellow. Search beneath for the bit by bit directions for the petals I surrounded with red.
In the first place, I filled it with level yellow.
At that point, I added a white feature.
A light earthy colored shadow follows them. Go around doing this to each petal each in turn.
Presently finish the focuses with some earthy colored/dark/white paint, and it is completely done.
Here is a bit by bit for the Colored Pencil draw a sunflower
I start with dark and earthy colored under draw a sunflower, simply concealing the territories that will be hazier later.
Utilizing a hazier blue, dim green, and most obscure yellow that I could discover, I extended the shadows further.
Utilizing a few different blues, greens, yellows, and earthy colors, I continue to add to the shadows I initially drew. Filling increasingly more of the image with shading.
Moving to significantly lighter and more brilliant tones: greens, yellows, blues, and a rosy earthy color, I add considerably more style to the drawing.
Toward the end, I utilize white, light yellow, and a vapid blender pencil to mix all the tones and ensure that no paperwhite is appearing on the other side. When the techniques are more obscure, similar to the haziest zones on the base, I utilized dull green, indigo blue, or dark, squeezing it hard to make a layer of shading over the paper. All done!
Markers draw a sunflower:
This is likely one of my top picks.
Watercolor:
I need to concede. You could make a sufficient showing with the watercolor one. I was getting somewhat worn out on draw a sunflower and painting a similar picture over and over, so I surged. Exercise learned: in the future, I will take as much time as necessary.
Alright, I have another admission. I surged the following four too. I actually believe that it gets the thought across. Exactly how unique a similar drawing will look in the event that you are utilizing various mediums.
Oil Pastels
PC Generated Graphics
So, I have taken in a couple of more deceives since I did this venture. Also, One day I will plunk down and make a superior showing with these. So, I appreciated making each and every one of these. After everything is said and done, Also, I do have one top choice among these. This one:
Here is one more. This one was finished with extra acrylic paint and q-tips. I rather like it.